
I’m a huge fan of The Killers and a huge fan of creating things. When The Killers play live they almost always haul along a huge K shaped stage light that acts as a sort of facade to the keyboard and synth stand used by Brandon Flowers.
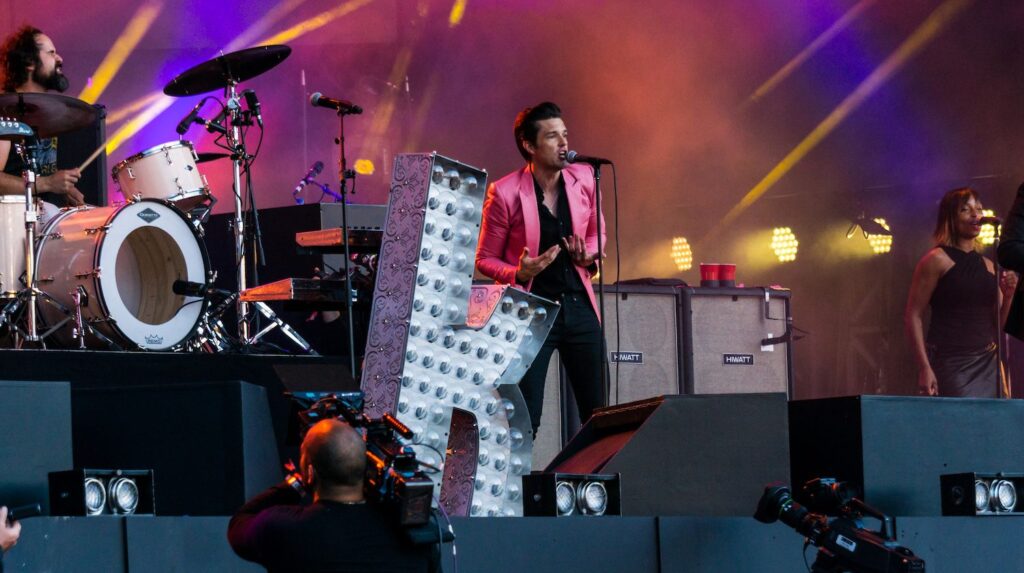
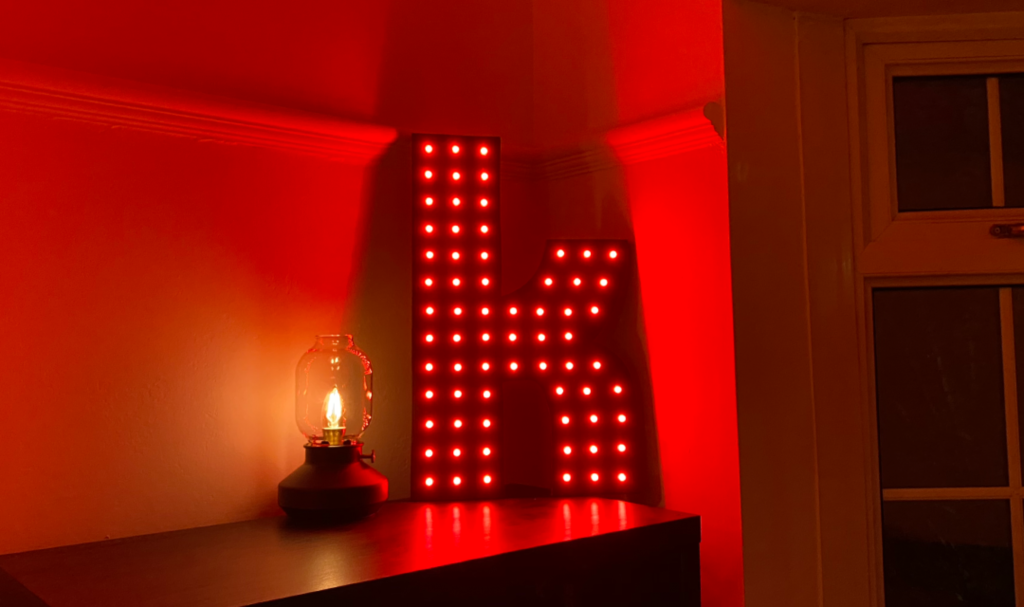
It’s this huge, maybe 5ft, K in the shape of their logo with 68 individual lights and i’ve admired it for a long time. I’ve wanted to build one, in whatever scale I could, simply because it looks cool and I love the band.
So, my first project of 2020 was to build it. And I love it.
Fighting with my ideas
I had been thinking about this project for a long time. I put it off so long because I didn’t have the skills or tools to do the work to a standard I would be happy with.
It had to meet some requirements for me to be happy:
- Solid – It needed to be made from good material. Wood was the obvious choice because it’s easier to work with, it’s fairly inexpensive and i’d already have some tools to work with it.
- Lights – It needed to have 68 lights which is the number of lights on the real stage light. These wouldn’t necessarily need to be real full size light bulbs, I would size them depending on the overall scale.
- Aesthetics – It needed to look good enough that it could live in my house. Whether that be my office or the main living area – it needed to match the quality of everything else in the room.
- Colour (optional) – I’m not sure myself whether the real version even had coloured lights originally but i’d like mine to.
I played with a few different ideas in my head. I considered making 1:1 scale version using wood – but I’d have nowhere for it and I’m not sure I fancied playing with mains voltage for the lights. I also considered miniaturised desk versions of it using small LEDs but it wouldn’t be “wow” enough.
In December I saw a video on ILTMS where Bob makes a Christmas tree game using programmable LEDs, ping pong balls and an Arduino. When I saw it I knew this was how I was going to make my K work.
The idea I landed on was this:
- Made from sheet wood and cut out using a Jigsaw in the shape of the K.
- String LEDs for the lights. I decided on 2 50 LED strings (5v WS2811). 1 string wasn’t enough (I need 68) and 2 is too many but i’ll have extra.
- Arduino would control the LED colour patterns. I decided on a fake Arduino Nano.
- Spray paint is what i’d use to give the wood a metalic look.
- Ping pong balls, like in Bob’s video, is what I would use as defusers for the lights and make the whole thing look more authentic.
Tools, material list and template towards the bottom of this article
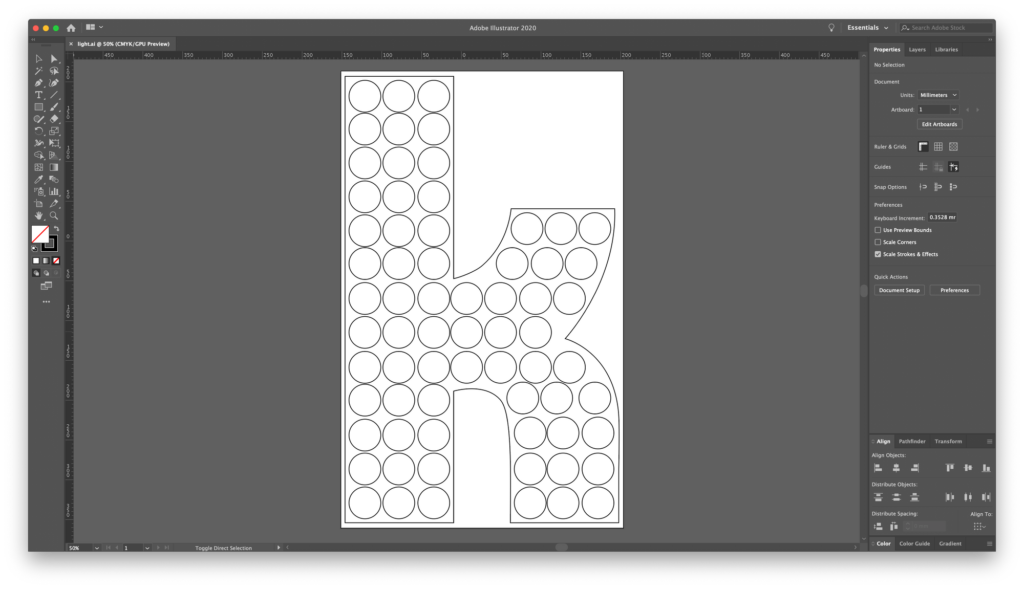
Design: Drawing 68 circles and some lines in Adobe Illustrator
I’m not going to pretend for a minute that I’m an expert in Adobe Illustrator. A big part of my career was spent using Photoshop so at least some of the shortcuts translated. I used Illustrator because I needed this whole thing to be scaleable if my plans changed and it gave me a chance to learn.
The starting scale for this was difficult to get right. I didn’t know the dimensions for the finished product because everything would be scaled from 40mm ping pong balls.
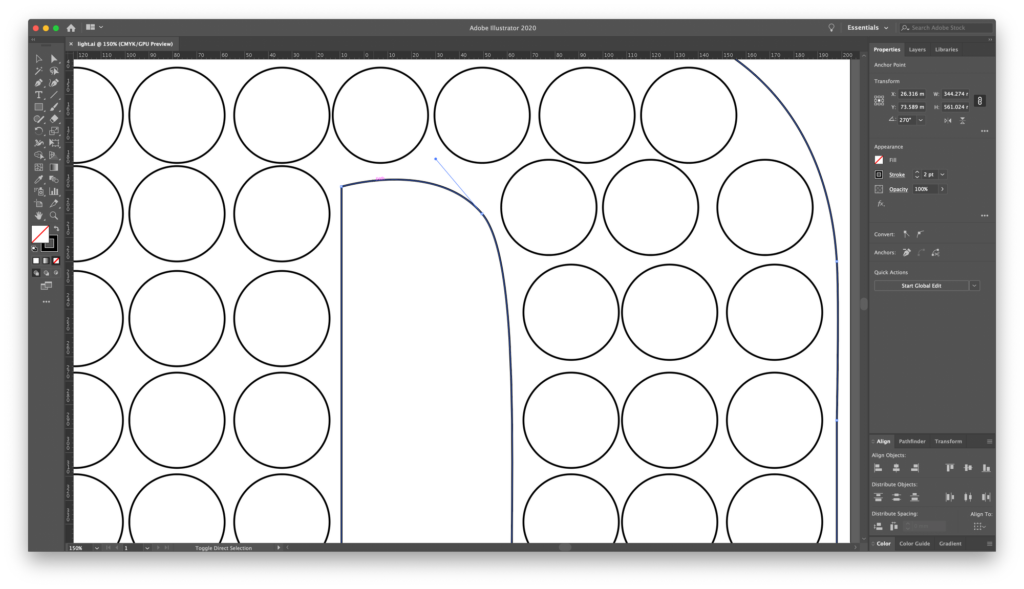
I started out with The Killer’s logo and scaled it up so that each circle in the K was 40mm in size. I then traced each circle in illustrator until I was done. Then I created a path around the outside of the circles to give it a solid shape.
This shape is what I will end up cutting out and the circles would be used to create centre points to drill for the LEDs.
Cutting: Getting jiggy with it
I used an 18mm thick sheet of laminated pine board for this project. It’s cheaper than plywood, has a better finish than chipboard and there is enough to make two of these 👀.
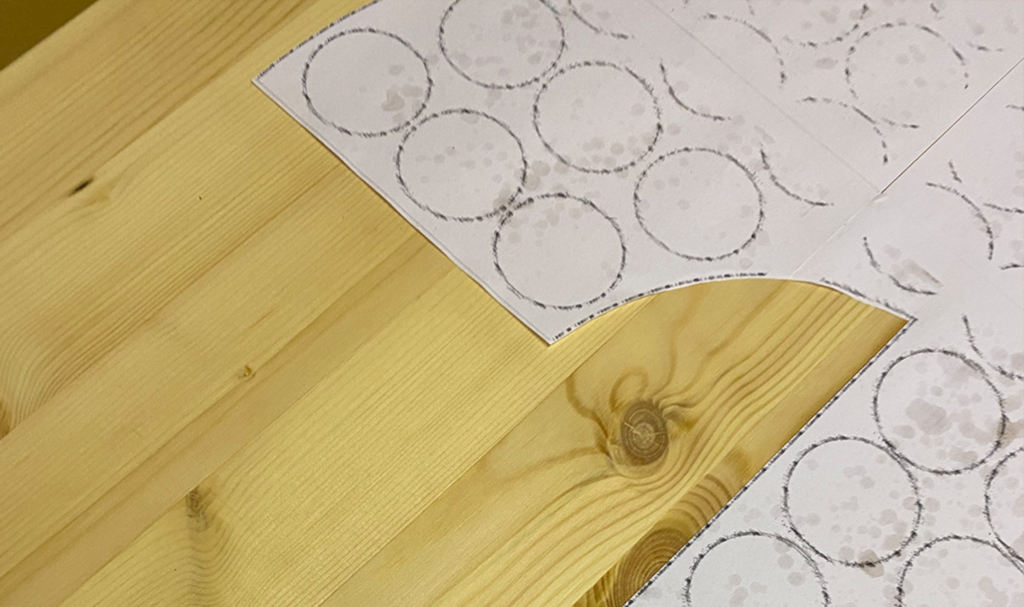
I printed my Illustrator design at 100% scale onto 4 sheets of paper and spray glued them to my pine board.
Top tip: Check your spray adhesive is still in date and ensure your printer has ink.

I bought myself a jigsaw for this project to make things a little easier. I’m invested in the Ryobi One+ battery system and having wireless tools is a life saver but you could easily to this with a cheap jigsaw or even a hand saw.
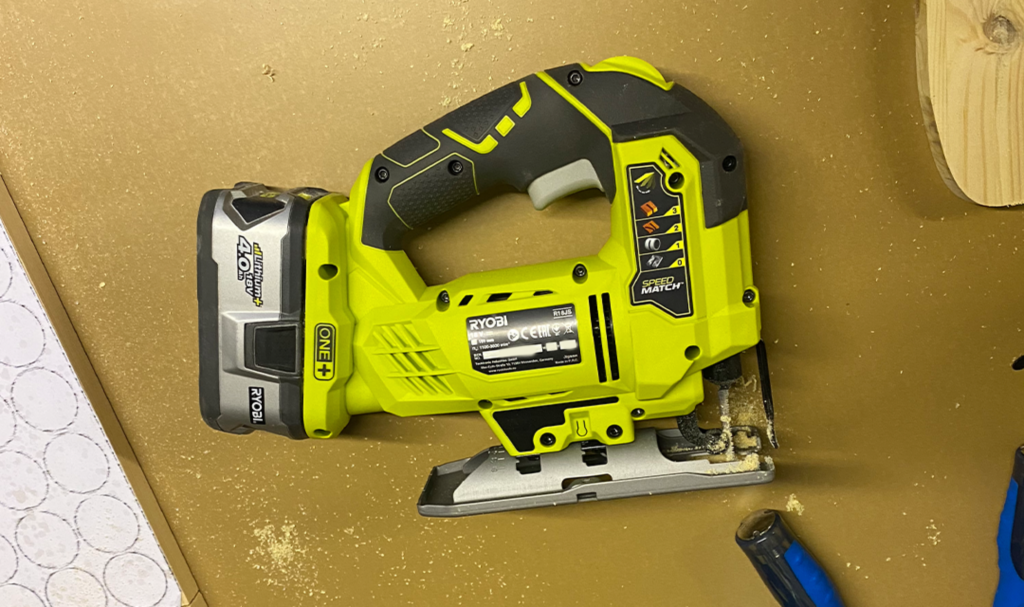
My first cut wasn’t the best and I quickly realised that getting the saw speed just right and selecting the correct blade makes a huge difference to your cut quality.
I drilled some holes around the edge of the design to make it easier to enter and exit my cut without sacrificing more of the board.
Drilling: 68 holes
With the template still attached I found the centre points of each circle (should have done this before I printed) and marked the hole with a centre-punch.
The LEDs for this project are around 12.5mm, so I opted for a tight fit instead of a loose one and used a 12mm drill bit – sixty-eight times!
Top tip: Drill from the front of the work piece to avoid blow-out/chip-out being visible.
Painting: A teenage life of vandalism would have helped
I opted to use spray paint for the sign because I assumed it’s easier to paint and you can get some really nice finishes. I decided to go with a metallic gun metal grey. I’ve never used spray paint before so I was very nervous about wrecking the entire thing.
The can recommends that you use surface primer on wood to get a nicer finish and I thought this may hide the wood grain pattern a little, but it can probably be skipped because it didn’t.
I sprayed the front and back of the sign with primer as my original plan was to paint the entire wood piece gun metal grey.
Gun metal grey was 100% the right choice. This colour looks fantastic and no photo could ever do it justice.
I decided in the end only to spray the front and edges grey. The back would be against a wall and be covered in LED cables anyway so it would be a waste of paint and time.
LEDs: Lighting the whole thing up
Once everything was dry it was time to start pushing 68 LEDs through the wood praying to god the wood didn’t split or the paint peel. This was actually quite a difficult job and my hands still cramp from it now.
I printed off a small diagram to help me wire this the way I had planned. The way this was wired was important because I plan on programming my own patterns in the future.
Once all the LEDs were seated correctly and at the same level I started applying a lot of hot glue to the cables to keep everything secured and low profile.
Arduino: Tiny little £3.50 computer
The LEDs are run from an Arduino Nano clone. This tiny little computer allows me to program my own patterns and use some cool libraries to get some smooth colour blending.
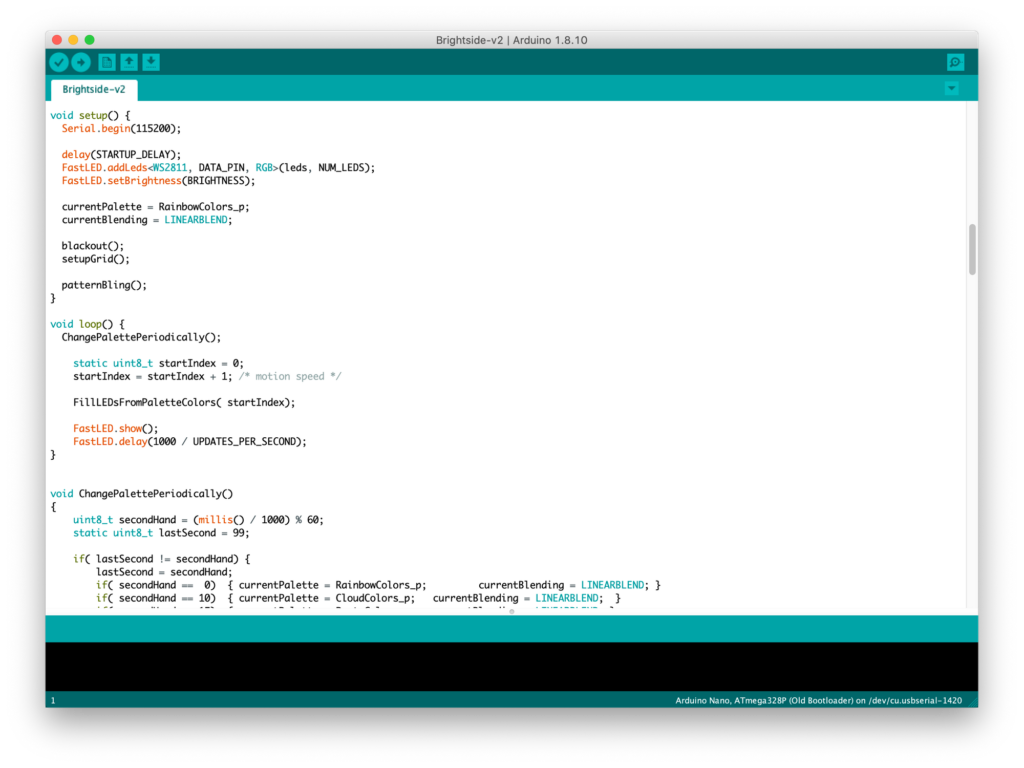
I’ll not go into the programming on this because I’m a little ashamed at how bad the code is. But it works!
It’s hard to see from the photo but pin D3 is soldered to the LED data pin, pin 5V is soldered to the live LED wire and pin GND is soldered to the neutral/ground LED wire. The whole thing is powered by a USB cable.
In the future I plan on adding a switch to move between light transitions and perhaps a sound sensor to make the lights react to music.
Ping pong balls
For this project I ordered 100 ping pong balls that would act as light defusers over every single LED.
I always thought that when this sign was turned off having the ping pong balls would make it still stand out and look like The Killers’ sign. It’s the reason I went with gun metal grey instead of white like the real sign.
In reality when I started punching holes into ping pong balls and seating them on the sign it started to cheapen the whole thing. So I scrapped the ping pong balls.
Finished: My own bit of Las Vegas
It’s one of my first projects at this scale and I couldn’t be happier with how it turned out. It ticks the boxes for me and looks great in my opinion.
Learning some of the skills needed to build this project was a little daunting but not impossible since I come from quite a creative background but I can see a project like this being achieved by anyone. I’d love to see variations of this using different materials.
Once the canvas mounting teeth arrives this will be hung on another wall attached to a smart plug so I can turn it on and off with Alexa.
What you’ll need and what it’ll set you back
I bought my materials from all over so I’ve listed below how much I paid and tried to find an alternative on Amazon to make things easier.
Materials
- 1200 x 400 Pine project board – The Range £10.99 | Amazon £30.99
- Gun metal grey spray paint – The Range £8.99 | Amazon £7.98
- Surface primer – Amazon £6.00
- 50 PCS WS2811 RGB LEDs (2x) – eBay £10.34 | Amazon £13.32
- Arduino Nano – eBay £3.35 | Amazon £6.99
- Mini USB to Micro USB Adaptor – eBay £1.87 | Amazon £3.99
- Micro USB Braided Black Cable 3m – eBay £3.49
- 12mm Drill Bit – Amazon £4.00
Tools
- Hot Glue Gun
- Jigsaw or hand saw
- Printer for the template
- Drill
Overall I spent around £56.55 in material costs and an extra £65 buying a jigsaw. You may already have some of the materials lying around or be able to find inventive ways to do certain parts.
With some of the materials I actually still have enough left over for another project but it’s hard to workout those costs, so I won’t.
Design Template
The design part of this build was really complex and it’s something I don’t expect many people to be able to do without knowledge of Adobe Illustrator or similar software.
You can download my template and scale it however you need. I can only vouch for the Illustrator (.ai) file in terms of correct scale but I have provided a few different versions just in case you don’t have Adobe Illustrator CC.
Future alterations
There are still some alterations I would love to make in the future to complete this whole project.
- I may still explore adding ping pong balls to this project as it ages.
- I originally planned on adding some aluminium flashing around the perimeter of the sign to make it look more authentic.
- I want to make the sign react to sound in the room and speed up animations depending on that.
- It would be cool to be able to control the light patterns remotely so I may explore adding an infrared remote. For now I have it plugged into a smart socket so I can turn it on and off with my phone.
